Understanding Salesforce migration requires understanding metadata. It is the mysterious data that lurks behind the scenes and is absolutely unknown to those who don’t deal with it directly.
Essentially, metadata offers and describes information about other data. Every customization or configuration done on Salesforce is stored as metadata, making it vital.
Salesforce migration is moving this metadata from one instance and deploying it in another. An example is moving a completed project from the development sandbox to the test environment. While the project was under development, all its information would be stored as metadata on Force.com. To migrate the project, Salesforce would retrieve the metadata and then deploy it in the new test/production environment.
Salesforce Migrations: 2 Methods to Retrieve and Deploy Metadata
Migrating changes in Salesforce can be a tricky task, but it is possible as long as you take careful considerations. There are many ways to deploy changes in Salesforce. The right approach depends on multiple factors, such as the size of the team, the complexity, the metadata itself, etc. Here, we tackle two of the simplest ones: Change Sets and Migration Tools.
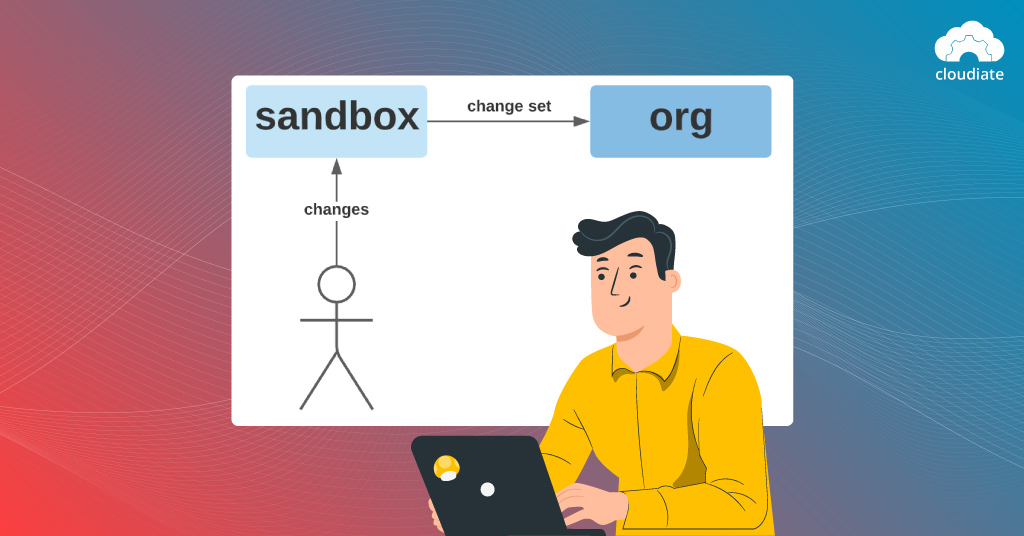
1. Change Sets for Salesforce Migration

The easiest way to migrate metadata in Salesforce is through Change Sets, because you simply have to point-and-click to move a change. You can pick what you want to move by clicking on the checkbox for each class, object, field, or more, making it effortless to deploy metadata from one sandbox to another or from sandbox to test.
How To Use Change Sets?
With Change Sets, the org decides which environment can receive a change and which one can send it. You can even control who has the permission to create and deploy Change Sets.
So, if there are three orgs: Dev, QA, and Productions, you can send changes from Dev to QA, QA to Production, or Production to Dev. Similarly, Production can receive changes from QA and Dev can receive them from Production.
To migrate a change:
- Build a deployment connection between the source and destination, so you have control over how changes move.
- Create an Outbound Change Set with the necessary checkboxes selected.
- Upload these to the target destination.
- The changes appear in the Inbound Change Set.
- Deploy the Change Set.
Why Use Change Sets for Metadata Migration?
This approach to Salesforce migration requires no tools, code, or commands, making it admin-friendly. Also, most people are familiar with it because it’s been there for a long while.
It’s also better than deploying changes manually, as it migrates all changes simultaneously and allows off-hour deployment. In case a change is not validated, it’s easy to clone the set and include the undeployed or invalidated change.
The Drawbacks Of Change Sets Migration
Change Sets work with just sandboxes, and they have to be built in the production org. The checkboxes represent only 10,000 items, putting a limit on files.
Additionally, if the source and destination org are on different releases, some metadata changes may not be deployed. In such instances, you’d have to wait for the two orgs to reach the same version or create a new sandbox in the right version. Finally, for large deployments, Change Sets consume a lot of time.
2. Salesforce Migration Through the ANT Tool

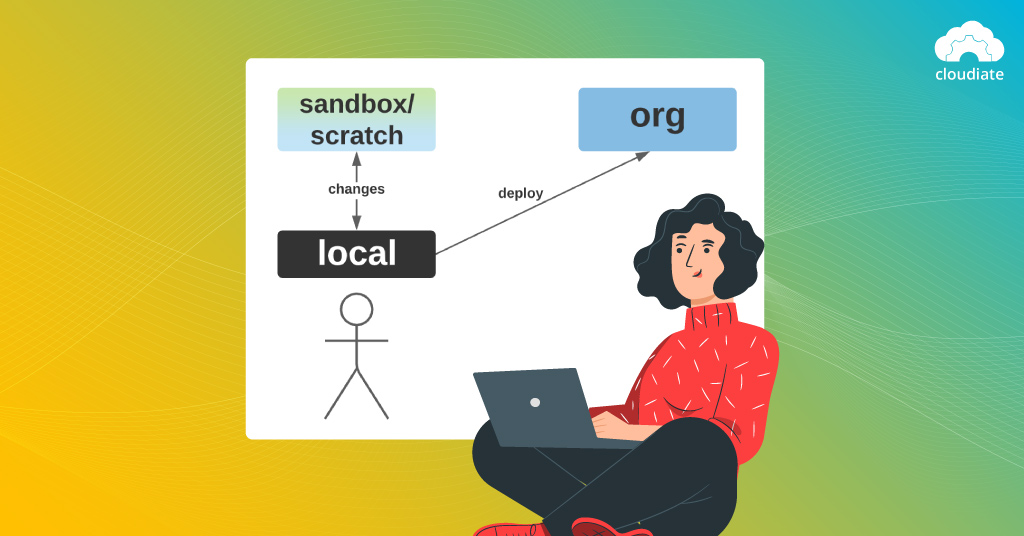
The second approach to Salesforce migration is direct deployment using the Metadata API through a migration tool like Ant. To utilize a migration tool, a JDK, jar, or Ant file is necessary, but after they are in place, change deployments become seamless, even for large sets of components.
The free tool provided by Salesforce, the Ant Migration Tool, uses the deploy() and retrieve() calls to move metadata between a local directory and your Salesforce organization. To migrate change from one environment to another:
- Retrieve metadata from the sandbox using the tool.
- A developer builds a code package with the necessary changes by hand via the Command Line Interface (CLI).
- Deploy metadata to production using the migration tool.
When To Use the Ant Migration Tool?
Projects that require multiple setup changes are best suited for the Ant Migration Tool. Another instance when this approach to Salesforce migration is ideal is in an iterative release process. When you have to build, test, and stage multiple times, scripted deployment of changes reduces effort and introduces efficiency.
Similarly, when the same parameters need to be deployed repetitively with changes, the Ant Migration tool makes the process painless.
The Drawbacks of Salesforce Migration Tools
Not everyone is comfortable with migration tools like Ant because they require deployment in a scripting environment. So, it can mostly be used by those in the IT field. For all non-developers, it requires a steep learning curve.
Moreover, Ant needs metadata to be edited manually, which necessitates time and leads to errors. It also demands profound knowledge of Salesforce. Lastly, it’s not conducive to remote working or teams that move around because the development environment is limited to a computer.
Breaking The Barriers of Salesforce Migration
Even the simplest approach to migration needs sufficient familiarity with Salesforce. Then there are methods of Salesforce migration that demand knowledge of code. On top of that, there are common issues that crop up when migrating metadata and deploying changes. All in all, even experienced developers can stumble along the way.
For individual Salesforce users, it appears to be too much effort with little benefit. It is why a reliable, certified Salesforce Partner is crucial. They can break the barriers of migrating metadata in Salesforce. When you aren’t confident enough to deploy changes, a consulting partner can either walk you through the process or perform it for you.
At Cloudiate, we have the expertise to transform a tedious migration project into a straightforward, seamless one. We offer complete Salesforce support tailored to the needs of your organization. Find out how a registered Salesforce implementation partner can impact your bottom line for the better!

